When placing an image on a product, it would be nice if its appearance remained consistent across different forms of the product. In particular, when placing an image on one shape or style of a product, if it still looked good on all the other ones. After all, no Zazzler wants customers to select a certain form of a product, only to be met with a less-than-good appearance of an image or, worse, empty space. Yet placing images for consistency of appearance can be a bit of a challenge. Not only can Makers offer new forms or styles of existing products, ones which have different design dimensions, but sometimes, just getting an image to look good on all the existing options can be problematic.
Designing for Zazzle thus requires some careful thought on how to go about placing images, at least if they are intended to fill all the design area of a product. (Note that the design area includes the safe area, guaranteed to remain on the finished product; a border which may or may not get cropped during printing; and a bleed area which is supposed to get cut, except not assuredly.) Obviously the shape of an image plays a big role, as does the precise placement, with centered, square images seemingly being the safest to work with. Aspect ratio and precise placement aside though, in my experience, it is usually just a matter of fully expanding the image on all the different forms of a product in turn, and then checking on all the others to see how things look. Appearance can then be optimized for all current forms, at least, simply by working on the “right” one to begin with.

The Greater Shore Inspirational Tile
© 2015 Darren Olsen
But how does one go about placing an image on a Zazzle product, and what problems can result when designing on one form and subsequently switching to another? Well, Zazzle’s design interface is fairly intuitive, at least. After adding an image, there are options to fill the design area as much as possible without cropping (this is referred to as “fitting” the image), or to fill the design area entirely, with cropping, if necessary (“filling”). Then there are options to center the image; shift it all the way left, right, up, down, or to any of the four corners. Lastly, images may be rotated, or aligned with one another if several are being placed, or other various advanced options. (If you would like to try some of this out for yourself, how about using The Greater Shore Inspirational Tile? Just hit the ‘Customize It!’ button on the product page to access the design interface.)
While it might be nice though, for instance, if an image which was expanded to fill the entire design area remained filled on all styles and forms of a product, or an image which was shifted all the way left remained so, such is simply not how it works. Again, images which are square in shape, and centered, seem to be the safest option, yet sometimes for artistic reasons, naturally, images are rectangular, or even in some other shape. And sometimes, too, if it is only possible to show a portion of an image with the remainder cropped (because the shape of the design area differs from the shape of the image), well, it may very well be desirable to keep the image off-center, so as to show the best portion possible. It is entirely possible then though that when switching to a product style with different dimensions, empty space may appear, as Zazzle’s software, again, will not necessarily keep an image expanded to all sides of the design area.
Light Switch Covers and New Product Forms
Consider, for instance, light switch covers. When I first began Zazzling, the only style of light switch cover offered was single toggle, so there was not even a question as to whether an image that looked good on one would not look so good on another. Varying forms of cover simply did not exist. Recently though, Zazzle has begun offering not just single toggle switch covers, but single rocker covers as well, plus, double- and triple-switch versions of each, for a total of six different forms. Now this was wonderful, actually, insofar as many people have light switches that are not single toggle. Given that quadruple and higher forms are presumably a bit rare, the only forms that Zazzle might yet consider adding, perhaps, are ones where an outlet is paired with a rocker switch, or paired with a couple toggles.
However … here, for instance, is my Flowers on Grassy Hills Single Toggle Cover (originally my Flowers on Grassy Hills Light Switch Cover), as well as how it looked as a double toggle cover:
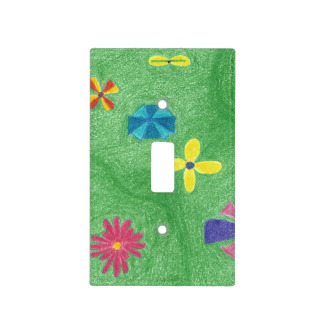
Flowers on Grassy Hills Single Toggle Cover
© 2016 Darren Olsen
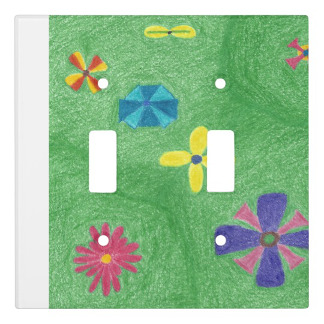
By default, the double toggle form of the original Flowers on Grassy Hills Light Switch Cover
© 2016 Darren Olsen
While I conceivably could have just left it up to customers to adjust the image on double- and triple-switch forms of the cover (after all, only the single showed by default in my store), this just struck me as very bad practice. Not only could a potential customer be deterred from making a purchase, but expecting people to have to customize a product, simply to make certain corrections to it, just felt a bit rude or inconsiderate.

Flowers on Grassy Hills Double Toggle Cover
© 2016 Darren Olsen
Hence, I had to revise the product to account for the new cover styles. But how so, precisely? Centering the image on the original cover would certainly have worked, yet I had originally off-centered it because it just did not look that great on the single-switch cover when centered. (Getting it to look good, in fact, was a challenge to me as it was. Getting an acceptable view of the flowers was not easy.) In this case then, as much as I would have liked to have avoided posting multiple versions of the cover, each with the image placed appropriately, I did just that, at least excluding the triple-switch styles. (This was a compromise of sorts to keep the number of virtually-the-same products down. I figured that single and double switches are probably more common–and people can always contact me if they would like me to make a given form of a product available for purchase–and multiple versions of one product just clutter things up.) Both fortunately and unfortunately, indeed, even with the smaller visible space on the rocker-style covers, they nonetheless looked good, so good that I could not just ignore them in favor of the toggle-style covers exclusively.

Flowers on Grassy Hills Double Rocker Cover
© 2016 Darren Olsen
(I should probably mention here that for many products, Zazzle makes it possible to either sell the product in all of its possible forms, or else to exclude certain ones. Here, for instance, given that the double-toggle and -rocker covers have identical dimensions, had Zazzle offered a “sell this design only on double covers” option and such, I could have gotten all six forms with only three products. Unfortunately though, for each product, it was either all six forms or just one, so in order to include rocker-style covers, I had to post them separately from the toggle ones.)
Now luckily, many of my switch covers actually had a centered image on them to begin with, and so there was no issue with how they looked as the five new forms. And for a handful of others, ones for which I had only very slightly off-centered the image, I came up with an approach that allowed me to get away with maintaining only one product apiece. Specifically, after filling an image and then off-centering it slightly, I proceeded to further expand it by an equally small extent, thereby ensuring no empty space on double and triple forms of the cover. Of course, this meant “cropping” a bit of the images on the original single-switch covers, not to mention still creating new products to replace the old. (Zazzle does not allow revisions on existing products, and probably for good reason, considering, for instance, that people may wish to purchase additional copies of the same product over time.) But while swapping out new products for old can be bad, insofar as any order history is lost, fortunately, most of my switch covers had and still have no order histories. And as for the “cropping” of the images, again, for most of the covers the difference was nearly imperceptible. The worst case was probably my Colorful Circuits Circuit Board Light Switch Cover, and as you can see, even it did not turn out too bad:

Colorful Circuits Circuit Board Light Switch Cover
© 2016 Darren Olsen

The original, less expanded Colorful Circuits Circuit Board Light Switch Cover
© 2015 Darren Olsen
Tiles, Pillows, Compact Mirrors, and Existing Product Forms

The double toggle form of the Colorful Circuits Circuit Board Light Switch Cover
© 2016 Darren Olsen

By default, the double toggle form of the original Colorful Circuits Circuit Board Light Switch Cover
© 2016 Darren Olsen
As I mentioned before though, the possibility of new styles or forms of products is not the only challenge in placing images for consistency. Often, just getting a consistent appearance on all the existing forms takes a little effort too. Now granted, the solution is generally always the same, and for some products, there may not even really be an issue. I have long known, for instance, that if I fill an image on a large tile, switch to the small version, and then fill it again, it will actually expand by a very small degree. While on the other hand, if I fill on the small tile, switch to the large, and fill again, it will actually shrink by a very small degree. The same is true, for instance, regarding polyester pillows versus cotton ones, as well as various other products.
Consequently, when placing images on these products, I always ensure that I work on the “right” form, even if I ultimately intend to offer, by default, another style in my store. For instance, with pillows, I always work on cotton, even if end up switching to and offering a polyester version by default. This way, I can be sure that there is no chance of a customer switching to a different form and ordering it, only to receive it and have even the slightest amount of blank area along the border(s). And really, for any product that comes in different forms (which includes the majority of them, at least considering the most popular products), working on the “right” one is simply how to do it, although this would not be obvious to someone just starting on Zazzle.
But again, in some cases, it is not just a matter of an ever-so-slightly “shrunk” image, which may or may not ultimately be an issue. Consider, for instance, my Magical Night Nighttime Scene Compact Mirror:
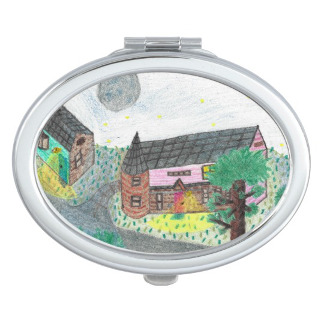
Magical Night Nighttime Scene Compact Mirror
© 2016 Darren Olsen
It turns out that if I had filled the image on either the oval- or heart-shaped mirror, for instance, then the square version would have shown distinct empty space both above and below, like this (empty space in black for emphasis):

A faulty version of the Magical Night Nighttime Scene Compact Mirror in the square shape
© 2016 Darren Olsen

The square version of the Magical Night Nighttime Scene Compact Mirror
© 2016 Darren Olsen
Now as it also turns out, “Magical Night” is a slightly rectangular image, and like I have said, such images are not as safe to work with as square ones. Presumably then, the less-than-square aspect ratio had something to do with this here, and similar cases with items like accessory bags and smart device cases. This just shows, either way, how important it can be to determine which form of a product is the “right” one to work with an image on, such that it looks consistently good on all the other styles. (For mirrors, it seems to be the round one, for instance, although with different images it is never a bad idea to test and double check. And some products, such as smart device cases, have so many different forms that you really have to pay attention.)
Conclusions
As you can see then, while Zazzle’s design interface is pretty straightforward, actually getting images to appear consistent across several forms of a product is not necessarily so. Pick the “wrong” form to work on, and customers could encounter empty space or unwanted borders when choosing their preferred form or style. Why this is so is not entirely clear, particularly since you would think that Zazzle’s software would guard against images failing to cover all of a product’s design area, if in fact an image was filled on even one specific form. Yet as you have also seen, the solution (perhaps “workaround” is a better term) is actually pretty straightforward as well. To get an image consistent on all existing forms of a product, you just have to use trial-and-error, filling on each form and then switching to each of the others and repeating the fill, to ultimately see which form is the “right” one to work on. Which to say, the one that, after filling, will not result in the image further expanding on any of the others upon a repeated filling. And as for new forms or styles, well, if you can anticipate new forms in advance, you might be able to preemptively design for them. Otherwise, it will be a matter of revising an old product (necessitating swapping out the old version for new one(s), albeit with the loss of order history), or else just restricting the forms that a customer can select. Neither approach is ideal, but to avoid customers encountering empty space, following one of them is essential.
(And here is an important tip as well: Since using the same image on many different products will virtually ensure that various cropping of edges will have to be done, it is always a good idea, when creating an image, to keep the essential parts away from the edges. This way, it can look good no matter the precise shape or dimensions of a given product.)
Well, I hope you have enjoyed my account of this somewhat dry and tedious subject. Unless you intend to become a Designer, it does not particularly concern you, since if you are simply customizing a product, you will only be concerned with the style you are buying. Nonetheless, as I soon learned once I began posting products on Zazzle, placing images for consistency of appearance is not quite as obvious as it seems. Yet it remains an important part of designing for Zazzle, both for successfully selling, but also for trying to ensure customers’ happiness and good experience.
